How to do a free move - in other words, how to get your carriage from one side of the machine to the other, without knitting, and without dropping stitches
Brother: Both part buttons in, set carriage to hold - hold is not necessary in most cases, but if you have needles in hold they may return to B position and drop the work.
Silver/Knitmaster: Use the carriage release lever, ie "pop the top"
Toyota: ??? Not sure, can someone tell me?
Passap:
Gx/Gx
Note: with the Japanese machines, you can take the carriage off one end and move it to the other. It's not possible on my Passap E6000 because the colour changer and other things are in the way.
Wednesday 18 November 2015
Monday 16 November 2015
Buying a knitting machine, part 2
I got a comment on a previous post I wrote here about buying knitting machines.
"Good summary of machines, but I was hoping you would actually say HOW to buy them. Any reputable websites for buying new (I guess only silver reed)? Any brick and mortar places to buy new or refurbished machines? Any buying tips or reasonable price ranges (so we know we aren't getting ripped off)? I would love to buy a knitting machine, but in months of looking I have yet to find an online source that seemed 100% reputable. Suggestions?"
Well, for a start, I'm in the UK, and I haven't bought machines from many dealers here. I bought my SK860 plus ribber new from Andeeknits, and she kindly adjusted it under warranty when it turned out the back rail wasn't square. All other machines I've bought second-hand from Ebay or from friends. I can also recommend Metropolitan Machine Knitting. I've also ordered small items from Heathercraft and Knits n Bits. There's a good list of all the current stockists I know about on the Machine Knitter's Treasure Chest site, under M/c and accessory shopping, but I cannot vouch for anyone I haven't personally used, so caveat emptor applies here.
As for pricing, well, it's a difficult one. Personally, I wouldn't pay more than £80-100 UK for a modern *(1980s onwards) punchcard machine, £100 for a ribber, and £200 for an electronic, and that's assuming they are in reasonable condition and mostly complete - I'm happy to replace small tools, but not to replace a vital component eg a sinker plate or carriage. But I can clean the machines up myself so am prepared for that. If you're a complete newbie to the whole machine knitting thing, it's worth paying more and getting your machine from a reputable dealer, so if something does go wrong you have someone to go back to and complain. If the dealer is an honest one they will have refurbished the machine and will have no problem in demonstrating it to you in person. I'd always try and buy in person if at all possible - you can then take the machine home with you and know that it didn't get damaged in the post.
Now, when it comes to vintage machines (earlier than 1980s), I'm afraid they are just curiosity value now. You'll struggle to get spares and repairs, and if a major item is missing (eg the carriage handle), well, I guess it depends how inventive you can be. I recently paid £20 for a vintage Record machine, it's a glorified peg loom really but makes great garter stitch. Having said that, if vintage is your thing, and you're happy to take a risk, go for it - but don't pay over the odds!
So yes, it's somewhat of a black art. However, you may not be aware that there's a big machine-knitting group on Ravelry - and those guys are always glad to look over an auction for you, if you spot something suitable. There's a whole list of useful threads here, but if you've spotted something likely, please start a new thread with a "is this worth a look?" or something, and include the link to the auction. As the group is international, it won't be long before someone takes a look and says "Well, I'd only pay xxx for that", "That's a steal, go for it!" or "It's missing the carriage! Beware". There's also a thread "For sale ads that made you laugh", reserved for us to share seriously overpriced or incorrectly labelled auctions - we poke fun internally at them. You can also tell us what you're trying to achieve with a knitting machine, and we'll recommend our favourites for something suitable.
Of course, if you're lucky enough to have a machine knitting group or guild that meets near you, why not ask them? Groups often have a healthy trade in second hand machines, and they'll be happy to bring you into the fold.
* For Brother, and for me personally, this would be the KH836 upwards as it has compatibility with other items eg garter carriages. I'm not so familiar with the entire Knitmaster range.
Tuesday 31 August 2010
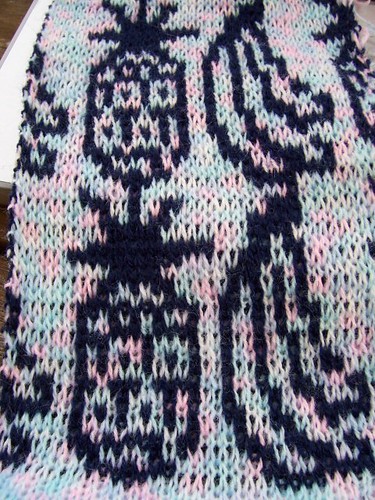
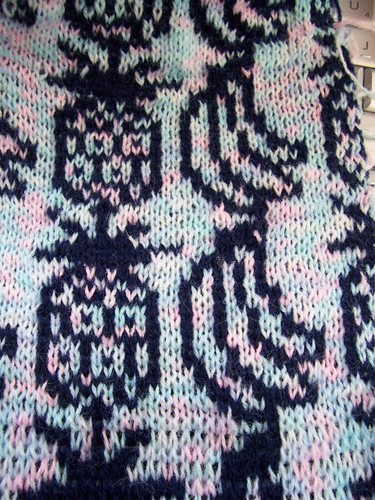
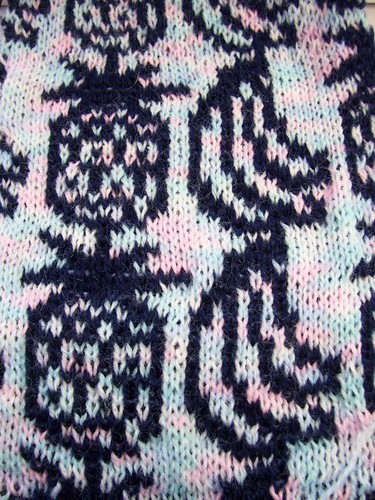
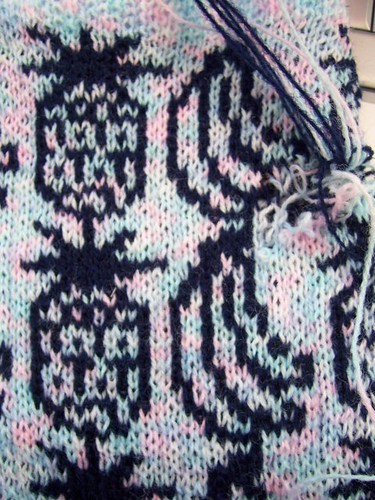
Double bed jacquard variations
I created a DBJ cheat sheet based on a handout I used to have, not sure who did it originally. I've added two of my own versions - reversible and vertical lined backing. These were all done on the SK840/SRP60N, so I cannot produce the reversible version, as Silver machines do not pre-select for the next row. There are some pictures of a previous experiment with reversible backing here and here.
Two-row backing
Front
Back
Two-row backing tends to elongate the pattern somewhat, so you might have to adjust your pattern to compensate.
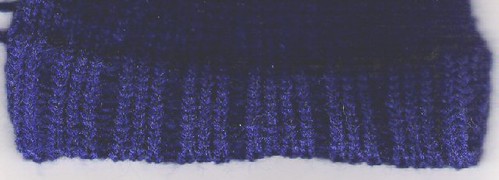
One-row backing
Front
Back
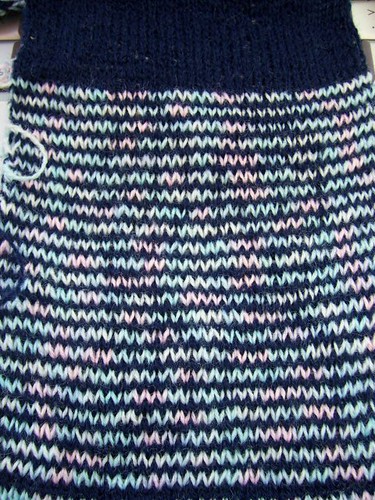
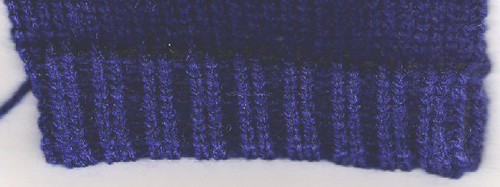
Plain backing
Front
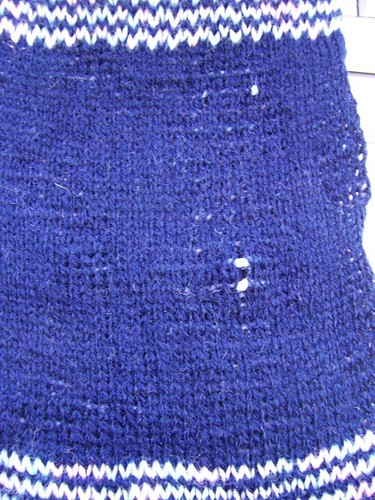
Back
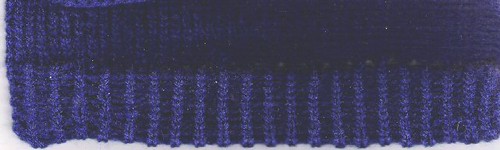
Bird's eye backing
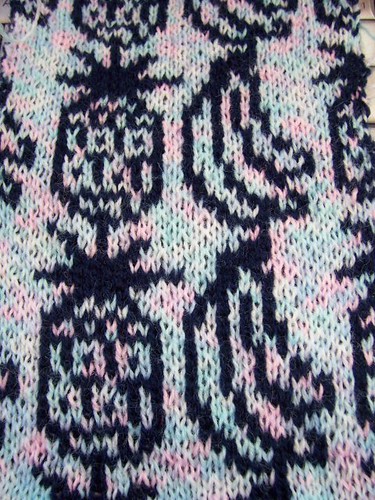
Front
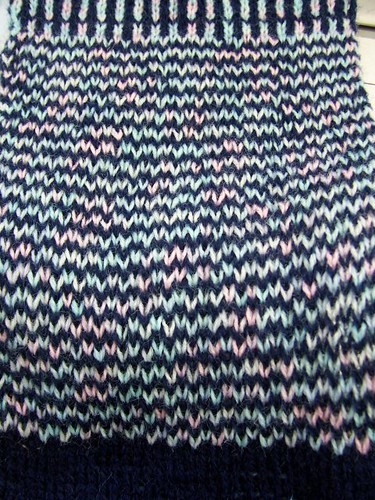
Back
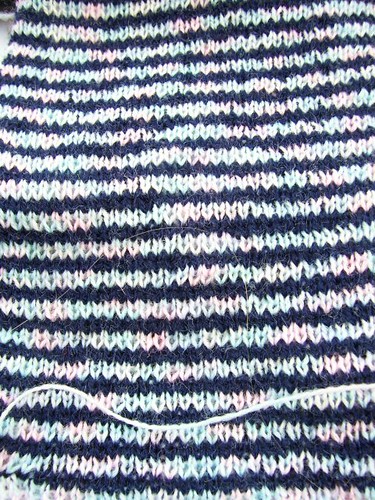
Vertical striped backing
Front - went a bit wrong and dropped some stitches

Back
Two-row backing
Front
Back
Two-row backing tends to elongate the pattern somewhat, so you might have to adjust your pattern to compensate.
One-row backing
Front
Back
Plain backing
Front
Back
Bird's eye backing
Front
Back
Vertical striped backing
Front - went a bit wrong and dropped some stitches
Back
Sunday 14 March 2010
Mock rib: 3x1
Cast on with waste yarn, putting every fourth needle out of work. Complete as for 1x1 mock rib.
Mock rib: 2x1
Cast on in waste yarn, with every third needle out of work. Complete as for 1x1 mock rib.
Mock rib: 1x1
Cast on EON (Every Other Needle) with waste yarn and knit a few rows, and then knit 1 row ravel cord. Knit required depth of rib at MT, and 1 row MT+2, followed by depth of rib again. Bring all needles into work.
Hang first row of knitting onto empty needles and knit 1 row.
Note: mock rib is not as stretchy as real rib.
Hems: decorative scalloped hem
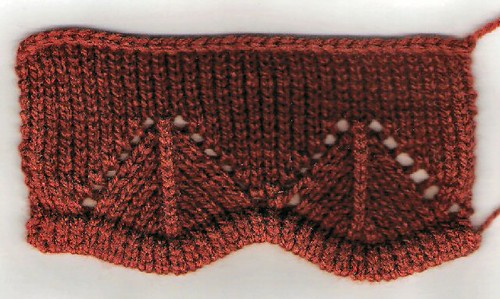
This hem is from the Brother knitting techniques book, page 128. It's an 8 row hem, and then groups of stitches are moved using the transfer tools, six stitches on the first row, five on the third, and so on.
Subscribe to:
Posts (Atom)